
 (entries)
(affiliates)
(misc)
(entries)
(affiliates)
(misc)
Been on a buying spree recently… oh well, since when am i not?
I got these fabulous Sigma brushes last weekend after waiting for 2 weeks or so after I placed my order with Sigma USA. They are absolutely lovely. So soft and nice on your skin…
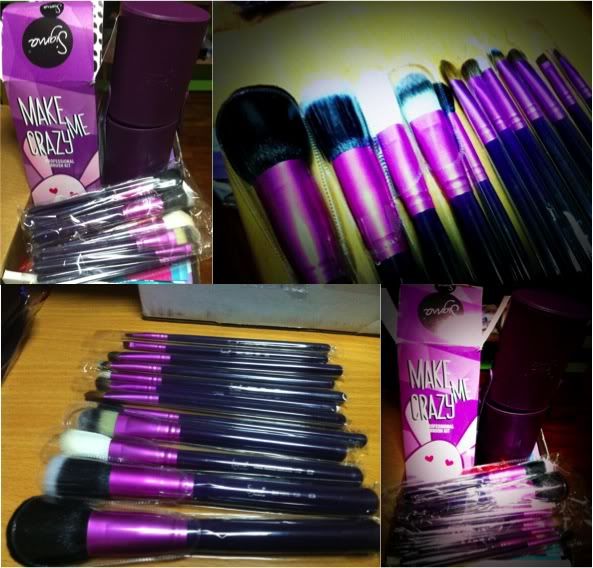
I got myself the Make me Crazy brush set which comes with 12 cosmetic brushes! Love the soft bristles! Been using them since I got them washed and dry. It’s things like these that keeps me going with the makeup regime. Teehee… >.<
Recent buys also include a bangle set from Forever New , the purchase was purely induced by the sheer encouragement of my lil’ sister. To think about it, I don’t really wear these sort of bangles to work and considering, I have been rotting at home on weekends, I wonder when will I ever get to wear them out.
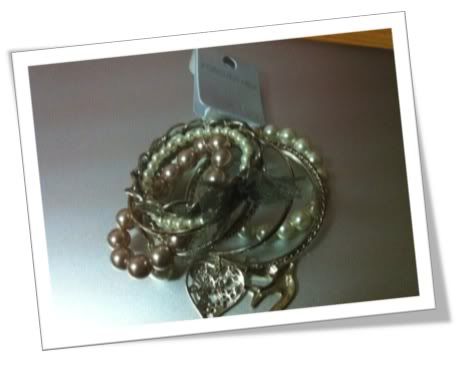
Sigh… but they are really quite a lovely lot.
Got myself some new skincare from Tony Moly as well. The latest addition to the whole range of Korean beauty shops in Singapore.
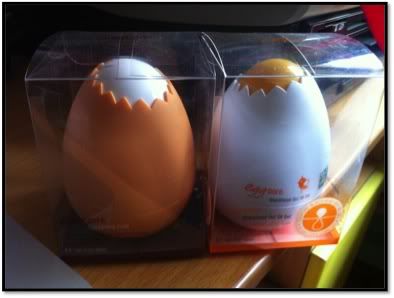
It comes in an interesting egg-shape packaging. The white one is supposed to help remove the blackheads, whiteheads and whatnots. The brownish egg is a pore tightening mask to be applied after you finished with the blackheads removal step. I have given it a try but I didn’t scrutinize my problem areas well so I don’t really know whether there’s any difference. =( Next week, I will use it again and this time, with the before and after pictures!
A few weeks ago, late one night when I couldn’t go to sleep, I decided to look through my lip color collection. And guess what greets me?
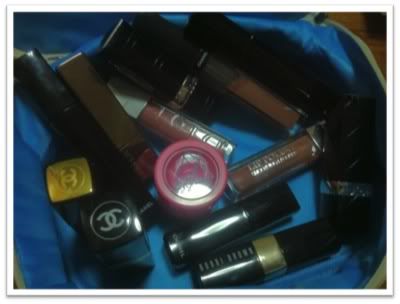
Terrible terrible lots of lip stuff! My goodness! I told myself that I really really need to stop buying these lip products because they will most likely end up in the trash way before they are all used up. =(
But I failed miserably. The very next day, I got myself the perfect neutral nude lipstick. :S
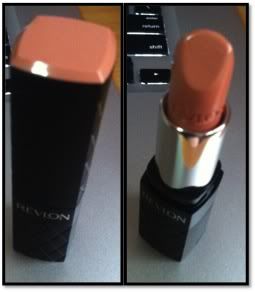
Revlon Colourboost Lipstick in Soft Nude
Lovely colour and texture. It is really creamy and easy to glide on. Feels moisturizing and not too dry. My lipcolor is quite dark so pale colours like nudes doesn’t really show up on my lips. But this, is totally amazing! It shows up perfectly. Do note that the picture don’t really do the colour justice. It looks more peachy and darker in the picture when in reality, it looks more nude and pale. Loving this~~
amor,esperanza y fe 5:30 PM.
Went to an ice-cream making workshop a couple of days ago and I am trying out the recipe on my own at home today!
I will be making mainly 2 different ice-cream flavours – Green Tea and Chocolate. Then, I will try to make a variant of Chocolate ice-cream by adding cashew nuts bits into it. You can use other types of nuts just follow the same steps.
I will try my very best to explain the recipe, showing step-by-step pictures. Good thing is I won’t be appearing in any of the pictures because I looked too shag and ugly!!
First up,
INDREDIENTS
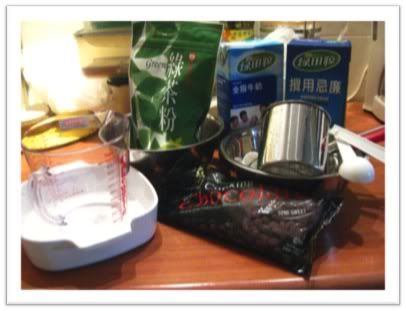
Here I am using (you can use any brands, it will serve the same purpose),
1. Green Tea Ice-Cream
To serve 170ml of ice-cream (equivalent to 1 small cup from normal ice-cream parlor)
1. 1 egg yolk (Tip: You can just crack the egg into a bowl and use a tablespoon to scoop out the egg yolk if you do not have an egg separator)
2. 100ml whipping cream (Tip: REMEMBER,THIS IS DIFFERENT FROM WHIPPED CREAM!! It comes in a packet like your milk instead of can and it is actually in liquid form. You can find it at the refrigerated section of the supermarket where you get your cheese, butter and whipped cream etc.I am using Greenfields whipping cream.)
3. 20g sugar (For a variation, you can use brown sugar or honey. For honey, replace the 20g of sugar with 30g of honey)
4. 75ml FULL-CREAM milk (If it isn’t fattening, it isn’t ice-cream! ;) Once again, I am using Greenfields full-cream milk. This sort of baking milk is using found in the non-refrigerated aisles)
5. 1 teaspoon green tea powder (NOTE: When I say powder, I really meant powder. Please do not cut open a green tea satchet and pour its contents out because I don’t think they are in fine powder form. I bought this green tea powder from NTUC Fairprice’s tea section. It’s not difficult to find. I am using Ten Ren Tea Co Ltd’s green tea powder)
2. Chocolate Ice-Cream
To serve 170ml of ice-cream (equivalent to 1 small cup from normal ice-cream parlor)
The ingredients are pretty much the same so I will just be lazy and copy some the points above. :P
1. 1 egg yolk (Tip: You can just crack the egg into a bowl and use a tablespoon to scoop out the egg yolk if you do not have an egg separator)
2. 100ml whipping cream (Tip: REMEMBER,THIS IS DIFFERENT FROM WHIPPED CREAM!! It comes in a packet like your milk instead of can and it is actually in liquid form. You can find it at the refrigerated section of the supermarket where you get your cheese, butter and whipped cream etc.I am using Greenfields whipping cream.)
3. 75ml FULL-CREAM milk (If it isn’t fattening, it isn’t ice-cream! ;) Once again, I am using Greenfields full-cream milk. This sort of baking milk is using found in the non-refrigerated aisles)
4. 50g to 75g of Baking Chocolate depending on how chocolaty you want your ice-cream to be. I am using the maximum (i.e. 75g) as I love strong chocolate ice-cream. ( Tip: In order not to make overly sweet chocolate ice-cream, I will not be using any sugar. Instead, I will use semi-sweetened baking chocolate. I am using Aalst cooking chocolate in semi-sweet)
Right, so now I will start with the Green Tea Ice-cream.
(My mixture will look slightly more in quantity as I am making 340ml of ice-cream instead of 170ml. Just double or triple the ingredients’ amounts accordingly. However for consistency, the measurements in the steps below are according to the 170ml ice-cream ingredient list that I have provided above.)
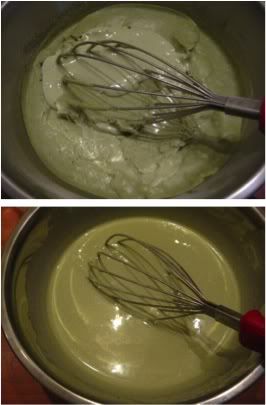
Step 1: Making the Green Tea Mixture
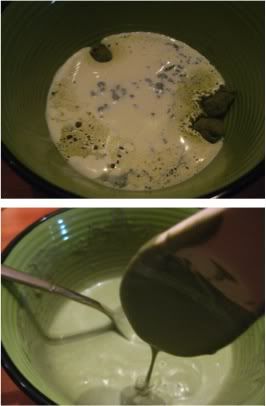
Step 1: Put your 1 teaspoon of green tea powder and 50ml of whipping cream (the rest of the whipping cream will be used later). Mix until mixture is even and runny with as little lumps as possible such as the 2nd picture above. Do note that green tea powder wouldn’t dissolve completely hence, it is absolutely normal to have little lumps. (you can add slightly more green tea powder if you like strong green tea taste. But do note that with more green tea powder, your ice-cream will be more bitter and harder in texture. Will recommend to add more sugar/honey.)
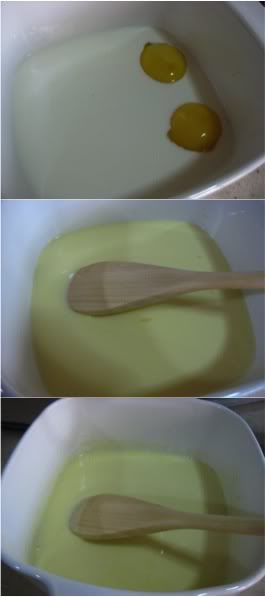
Step 2: Making the Sugar-Egg yolk Mixture

Add the egg yolk and 20g sugar in a bowl and mix well till the mixture is of a pale yellow color as in the 2nd picture above. I use a whisk here but you can use a regular spoon or fork. It doesn’t matter.
Step 3: Making the ice-cream custard

I know the heading for this step is a little deceiving. There are more than 1 step to create this mixture.
This step is pretty similar to how you make custard. Just without the flavouring essence.
Pour the 75ml of milk into a pot and heat it on low heat. Stir continuously using a wooden spoon for a minute or so till the steam appears. Once steam is spotted, turn off the heat. DO NOT ALLOW THE MILK TO BOIL.
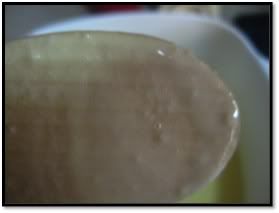
Although I am using a regular porcelain pot over the gas stove. I will highly recommend cooking it over induction cooker with a double bottom pot (actually, I am not sure what is the correct name for this kind of pot. So, here is a picture of it.
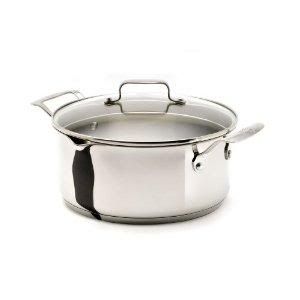
Not sure whether this is clear, but can you see that there is a engraved line around the bottom of the pot? It looks as if the pot as second base. This kind of pots will ensure that heat is evenly distributed throughout the base of the pot. You can get a small double base pot from Ikea at quite a reasonable price.
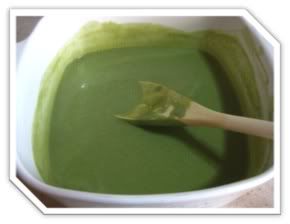
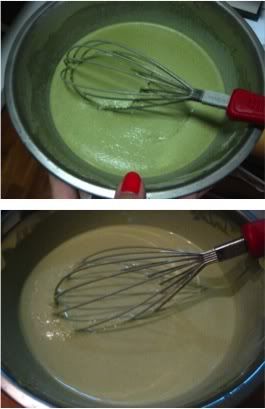
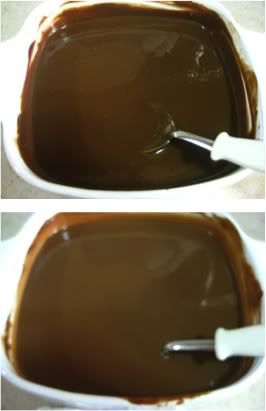
After heating the milk, slowly dribble the milk bit by bit into the sugar-egg yolk mixture, stirring the mixture constantly. Once the milk is well-mixed with the sugar-egg yolk mixture, pour the final mixture into the pot. This is your ice-cream custard – 2nd picture in the above collage.
Heat your ice-cream custard over low heat, stirring constantly. It usually takes about 3-5 minutes and the process is usually faster if you use the gas stove. Turn the heat off when the mixture thickens and coats the back of your wooden spoon like that (below). It’s quite obvious when the mixture thickens because it will become smoother and more silky.
Step 4: Making the Green tea custard mixture
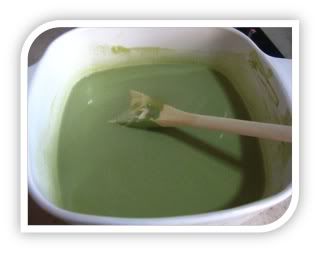
To obtain the mixture in the above picture, slowly dribble bit by bit into your green-tea mixture in Step 1. As you pour with one hand, stir the mixture thoroughly with the other hand until the mixture is smooth and has a consistent color.
Step 5: Making the Green tea ice-cream mixture
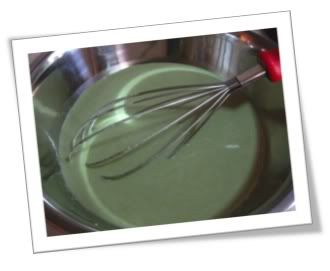
Add the remaining 50ml whipping cream into the Green Tea custard mixture. Stir continuously until you have an even and smooth mixture like the above picture.
Step 5: Finishing touch
Lastly, use a fine sieve to get rid of lumpy bits in your mixture in order to make smooth ice-cream. Put the mixture in a stainless steel bowl along with a whisk into the freezer for 45mins.
Step 6: The first churn
After 45mins, your mixture will harden or solidify, akin to the top picture (minus the liquid). You will then need to use the whisk and churn the mixture by hand. Churning means you mix the mixture using the whisk until it is of a consistent texture which is like cream – semi-solid form. Churning helps to mix air into the ice-cream mixture, resulting in smoother ice-cream. The 2nd picture is how my ice cream mixture looks like after the first churn. It is slightly more fluid because I didn’t freeze it long enough. :S
After the first churn, put your ice-cream mixture back into the freezer for another 30 mins.
Note: The following are possible reasons for harder ice-cream mixture that are more difficult to churn
1. If you like stronger green tea or chocolate taste, you would have added more of the two, resulting in a mixture which is harder.
2. You may have over-freeze your ice-cream mixture
3. If you are making larger amount of ice-cream, your mixture will be harder to churn resulting solely from its volume.
If you are determine to make your own ice-cream and for a large number of people, you can consider purchasing an ice-cream maker which will help you churn your ice-cream. Do note that ice-cream makers are to help with the churn, the rest of the cooking and mixing, you will have to do it on your own. =)
Step 7: The second churn
Sorry for the bad lighting. The first picture was taken after taking out the green tea mixture. The second one was taken after the second churn. I know it look ghastly but rest assured, it looks brighter in real life. :P
After the second churn, put it back in the fridge for another 30mins and it is ready to be served! =) I didn’t have time to take a snap of the finished product today. Will try to do so soon!
Next up, Chocolate Ice-cream
Step 1: Making the custard
The custard for chocolate ice-cream is slightly different because as I have mentioned earlier, no sugar will be added. So here, we just add the egg yolk to milk and stir the mixture till smooth. Thereafter, we will put it over low heat and stir constantly. Once again, DO NOT ALLOW THE MIXTURE TO BOIL. Similar to the green-tea ice cream’s custard, cook till the mixture thickens and coats the back of the wooden spoon.
Step 2: Creating the chocolate fondue
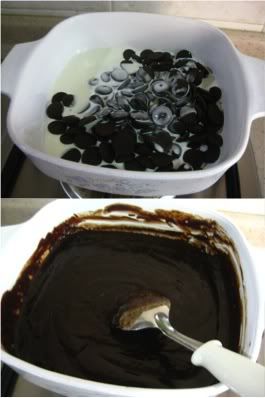
This is how you make chocolate fondue, just with more chocolate and less cream. ;)
Add 50ml whipping cream to 50g to 75g of chocolate, turn on the low heat and stir constantly till you obtain a chocolate fondue like mixture.
Note: Chocolate tends to burn easily, hence, you really need to be careful and keep stirring!
Step 3: When fondue meets custard with cream
Dribble the custard mixture bit by bit into the fondue, stirring and mixing till you have a consistent mixture like the top picture. Finally, add the remaining 50ml of whipping cream into the mixture and mix well.
The subsequent steps are pretty similar to the green tea ice-cream making.
Step 4: Sieve the mixture to obtain a smoother texture without any lumpy bits. Put the mixture in a stainless steel bowl together with a whisk in the freezer for 45mins.
Step 5: After 45mins, churn the mixture and put it back into the freezer for another 30mins
Step 6: Finally, churn the mixture again and put it back into the freezer for another 30mins before serving.
For the nutty version of Chocolate Ice-cream,
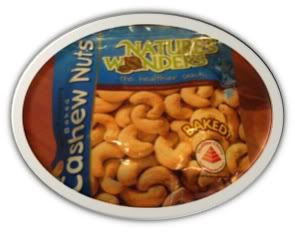
You can add nuts into the ice-cream, as you can see from the picture above, I am using Cashew Nuts.
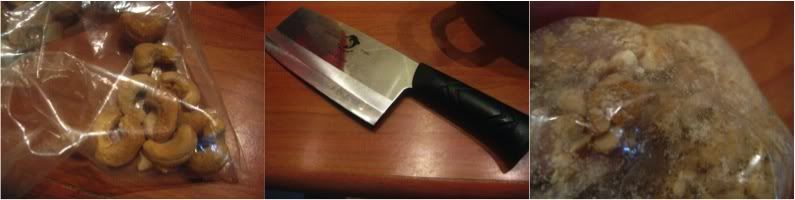
To obtain nut bits, I put about 10 cashew nuts into a zipped lock bag and use the handle of the chopper to crush the nuts into bits. Not sure whether you can see clearly from the rightmost picture.
When you are doing your first churn,

Add in the crushed nuts and mix well. Proceed with the other steps as per the above!
Woo! This is such a long post and such a long day. I am going to post without checking!
Oh! Before I forget,
Learning Points:
1. Please check your freezer’s temperature is set to the lowest possible. I didn’t check the temperature and only realized that my freezer’s temperature is at its maximum after an hour. =(
2. Remember if you are making more than 170ml of ice-cream, the time taken to freeze the ice-cream will be longer
3. For the chocolate ice-cream, remember to use a lighter pot for cooking the custard so that it is easier to pour the mixture into the chocolate fondue, mixing it at the same time.
Right, that’s all! =)
amor,esperanza y fe 11:12 PM.
